Shipment Settings
Shipment Settings
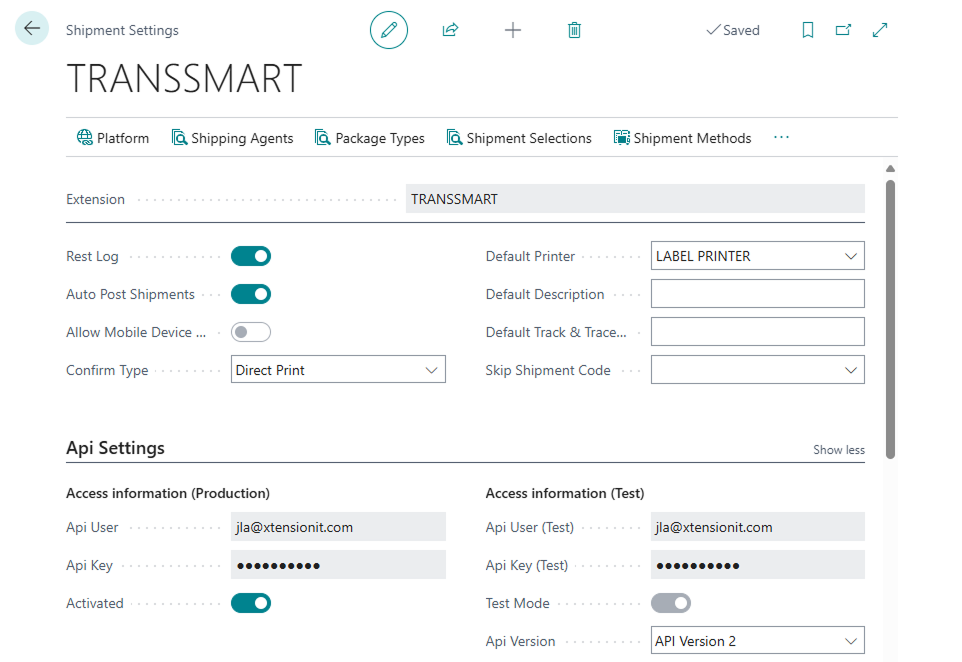
Section titled “Shipment Settings”Shipment Settings is the page of which all of our settings, options and additional information is kept. This is also where you connect with the given Multi-Carrier Platform. From here you can setup your Sender Address information, Shipment Measurements, confirmation types and more.
To see how you connect to the individual Shipment Connectors please see their individual pages here:
Test Mode
Section titled “Test Mode”Test Mode allows you to connect to a carrier’s sandbox or test environment instead of the live production environment. This is useful when setting up a new connector, testing carrier integrations, or validating your configuration without creating real shipments or incurring charges.
- When Test Mode is enabled, the connector uses a separate set of test credentials — Test API User, Test API Key, and Test API URL — instead of your live credentials. Any shipments created will be sent to the carrier’s test environment only.
- When Test Mode is disabled, the connector uses your live credentials and all shipments are real.
- Test Mode is configured per connector, so each connector has its own independent Test Mode setting.
- Use Test Mode during initial setup and when testing new carrier services or configurations.
- Remember to disable Test Mode before going live — leaving it enabled means no real shipments will be booked, even if everything else appears to be working correctly.
Create Waybill with Document Header
Section titled “Create Waybill with Document Header”The Create Waybill with Document Header setting controls whether a waybill is created automatically when a source document is created in Business Central, or whether the user must trigger waybill creation manually.
- When enabled, a waybill is automatically created at the same time as the source document (Sales Order, Transfer Order, or Service Order). Users do not need to click New Waybill — it appears on the document immediately.
- When disabled (the default), waybill creation is manual. Users must open the document and trigger it via Actions > Shipment > New Waybill or the Shipment ribbon.
- This is a global setting that applies to all documents processed through the connector.
- Consider enabling this in high-volume environments where every order requires a shipment label, as it removes a manual step from the process.
- Consider leaving it disabled if not all orders require a shipment — for example, if some orders are collected in person or handled through a different process — so that waybills are only created when actually needed.
Pick-up Times and Instructions
Section titled “Pick-up Times and Instructions”The Pick-up Times and Instructions settings let you define a standard carrier pick-up window and any special instructions for the carrier. These settings are configured on the Shipment Settings page and are automatically applied to new waybills when enabled.
The following fields are available:
- Use Pick-up — A toggle that enables automatic pick-up scheduling. When this is turned on, the pick-up time and instruction fields below are automatically copied to the Pick-up Information section on the Waybill Header whenever a new waybill is created.
- Pick-up from Time — The start time of the carrier’s pick-up window (for example, 13:00).
- Pick-up to Time — The end time of the carrier’s pick-up window (for example, 16:00).
- Pick-up Instruction — A free-text field for any special instructions for the carrier (for example, Ring doorbell or Use side entrance).
When to use this: If your carrier collects shipments at the same fixed times each day, enabling Use Pick-up saves you from having to fill in the pick-up window on every waybill manually. Set your standard pick-up window once in Shipment Settings and it will be pre-populated on all new waybills automatically.
Where to configure: Open Shipment Settings and locate the pick-up fields in the setup area.
Reference Mask and Pre/Suffix
Section titled “Reference Mask and Pre/Suffix”The Reference Mask and Reference Pre/Suffix fields on the Shipment Settings page let you control exactly how the order or document number appears as the carrier reference on the waybill.
- Reference Mask — extracts a specific segment from the External Reference field using a
%-delimited pattern. For example, if your order number isSO-2024-001and you only want001to appear on the carrier label, a mask of%-%-%tells the system to extract the third segment. The number of%characters determines which segment is used. - Reference Pre/Suffix — adds a fixed piece of text before or after the extracted (or original) reference. For example, entering
ORDER-would result in the reference appearing asORDER-001on the label. - When to use these settings: Use them when your order numbers contain prefixes, year segments, or other parts that should not appear on the carrier label — for example, when the carrier only needs a short numeric reference rather than your full internal document number.
- If neither field is configured, the External Reference is forwarded to the carrier as-is.
Default Package Description
Section titled “Default Package Description”The Default Description field on the Shipment Settings page lets you define a standard package description that is automatically filled in on new Waybill Lines when a waybill is created.
- When a new waybill is created, the Default Description is automatically inserted as the Package Description on each Waybill Line — saving you from having to type it manually every time.
- If a Package Type is selected on the Waybill Line and that Package Type has its own description defined, the Package Type description takes precedence and the default is not used.
- When to use this: Set a Default Description when you always ship the same type of goods and want a consistent package description on every waybill without manual entry — for example, General merchandise or Spare parts.