Multi Entity Management
Cross-environment setup
Version: January 2025 / 6.0.1
1. Preamble
This Guide describe how to setup Multi Entity Management to publish data to Entities (Companies) located in separate environments/databases. The term “Environment” is used to describe one or more Business Central environment(s) stored in a Business Central tenant. The term “database” is used to describe an on-premises Business Central database. The term “entity” is used to describe one or more companies in an environment/database. This Guide will use the term “Environment” covering both environments (cloud) and databases (on-prem).
2. Preparing the Subscriber Environment
In the subscriber environment start the setup with the subscribing entity. After the preparation of the subscribing environment, all the publishing setups will be managed in the publisher environment with the Master data from the publisher entity.
The best practice is to create a Local Publisher entity in the subscribing environment. The Local Publisher in the Subscriber Environment will publish all data received from the Publishing Environment to the Subscribing Entities in the Subscriber Environment.
2.1. Initial Setup
-
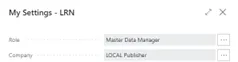
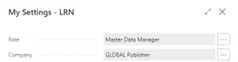
Start Business Central with the Role “Master Data Manager”.
-
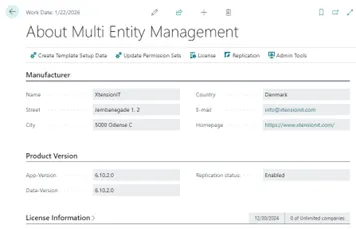
Go to “About Multi Entity Management” page.
-
Activate the function: “Create Template Setup Data”
-
For Microsoft Dynamics 365 Business Central, version 17 and below.
- Activate the function: “Update Permissions Sets”.
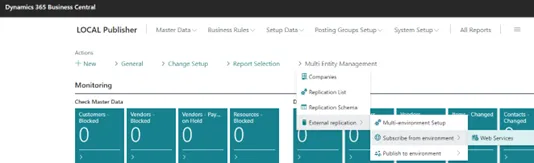
2.2. Multi-environment Setup
-
Go to the page “Multi-environment Setup”.
-
When the page “Multi-environment Setup” is opened, Multi Entity Management performs an automatic setup. Please note that the “General” section, is only used, if the Subscriber Company, also acts as a Cross Database Publisher.
-
After the page is shown on the screen, the initial setup has been done and the page can safely be closed again.
2.3. Setup Web services
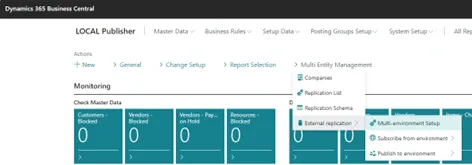
- From “Subscribe from environment” open the page “Web Services”.
-
Add Codeunit 5397816 “XTEMEMSubscriber Data Service” to the list.
-
In the field “Service Name”, name the service. (Example: MemSubscriberService)
-
Remove the checkmark in the “All tenants” field.
-
Set a checkmark in the field “Published”.
-
-
Add Codeunit 5397819 “XTEMEM Subscr Mgt Svc Interf” to the list.
-
In the field “Service Name”, name the service. (Example: MemManagementService)
-
Remove the checkmark in the “All tenants” field.
-
Set a checkmark in the field “Published”.
-
When publishing the two webservices, an URL is created in field “SOAP URL” for each webservice.

- Activate both webservice URL to check that they are working.
3. Preparing the publisher environment and entity
The next step is preparing the publisher environment with the publishing entities to replicate data to the subscribing environment and entity. After the preparation the Master Data is ready for replication.
3.1. Initial Setup
Start Business Central with the Role “Master Data Manager”.
Go to “About Multi Entity Management” page.
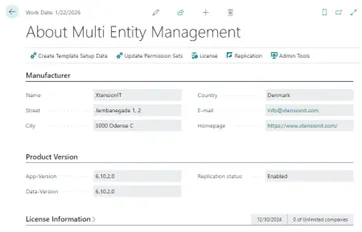
- Activate the function: “Create Template Setup Data”
- For Microsoft Dynamics 365 Business Central, version 17 and below.
- Activate the function: “Update Permissions Sets”.
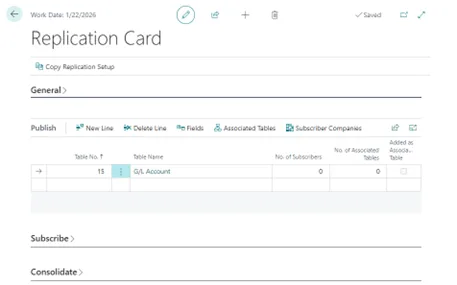
3.2. Publishing entity setup
Go to the “Replication Card” and do the “Publish” setup for the Publishing entity, so the entity is marked as “Publisher” in the Replication List page.

3.3. Multi-environment Setup
- Go to the page “Multi-environment Setup”.
- When the page “Multi-environment Setup” is opened, Multi Entity Management performs an automatic setup.
- After the page is shown on the screen, the initial setup has been done and the page can safely be closed again.
3.4. Repository List
- Go to the “Repository List”
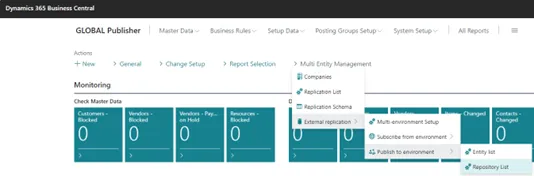
- Create a CODE and Description for the Repository that contains information about the tables and fields from the subscribing environment.
3.5. Publish to entities in other environments
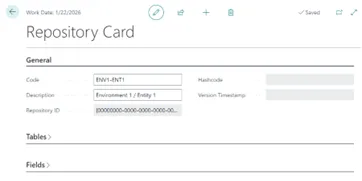
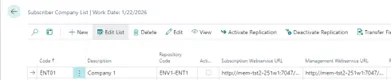
- Go to the “Entity List”
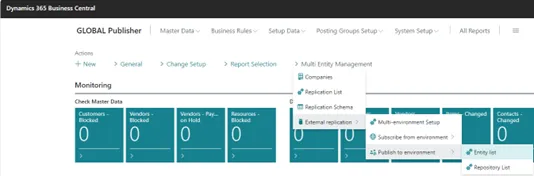
- Insert “Code”, “Description” to identify the Subscribing Entity and Environment
- Insert the “Repository Code” for the Environment where the Entity belong
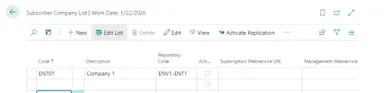
- Go to the Subscribing Environment and Entity and find the SOAP URL’s for “Subscriptions” and “Management”
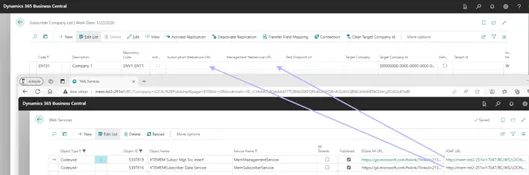
Copy the values to the “Subscriber Company Line”
- Choose the Authentication Methods
- Basic Authentication/Web Access Key: Insert User/Id and Password/Key. The field “Tenant Id” is left empty, without any value. (See section 1.4 about how to setup authentication)
- Service-to-Service (Client Credentials): Insert Tenant Id, User/Id and Password/Key. (See section 1.4 about how to setup authentication)

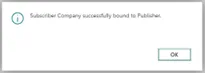
- Run the function “Bind-to Subscriber” and get the confirmation box.
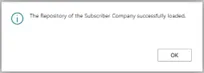
- Run the function “Get Repository” and get the confirmation box.
3.6. Replication Setup
- It is now time to do the Cross Environment Replication setup
- Go to the “Entity List” and open the Page Card.
- Do the Replication Setup in the “Dependent on” section and set Checkmark in the “Subscribe” field.
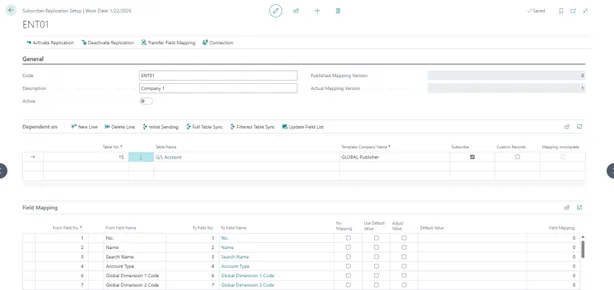
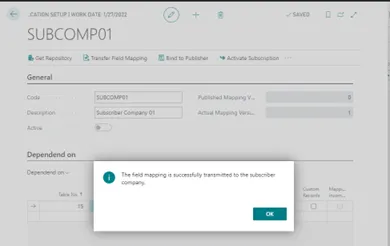
- Use the function “Transfer Field Mapping”, to transfer the records to the “Subscriber Company”
- Use the function “Activate Subscription” to automate the replication
4. Authentication methods.
There is different requirement to the authentication’s methods used, when replicating data across different version of Business Central Environments/Databases and NAV Databases.
4.1. Basic or Service-to-Service Authentication.
When Master Data is replicated between different Environments or Databases there is a requirement for either Basic or Service-2-Service Authentication to validate the communication. When a Business Central Environment is part of the replication, Service-2-Service Authentication is required. See the table below.
| Publisher | Subscriber | Authentication |
|---|---|---|
| Business Central (SaaS) | Business Central (SaaS) | Service-to-Service |
| Business Central (SaaS) | Business Central (On-premises) | Service-to-Service |
| From BC version 18 or later. | ||
| Business Central (SaaS) | Microsoft Dynamics NAV | Basic |
| Up to BC version 17 or later. |
| Publisher | Subscriber | Authentication |
|---|---|---|
| BC On-premises (BC 18.0 or later) | Business Central (SaaS) | Service-to-Service |
| BC On-premises (up to BC 17.0) | Business Central (SaaS) | Not possible |
BC On-premises Business Central (On premises) Basic BC On-premises Microsoft Dynamics NAV Basic
Microsoft Dynamics NAV Business Central (SaaS) Not possible Microsoft Dynamics NAV Business Central (On premises) Basic Microsoft Dynamics NAV Microsoft Dynamics NAV Basic
*) For running the Service-2-Service Authentication on Business Central on-premises versions 18 and 19, these versions must be updated to BC 18.11 and BC 19.5 or newer.
More details can be found with the Microsoft Learn link: https://learn.microsoft.com/en-us/dynamics365/business-central/dev-itpro/administration/automation-apis-using-s2s-authentication
4.2. Basic Authentication – Initial setup
To enable the Basic Authentication methods, create a User assigned both the “Business Central Password Authentication” and a “Web Service Access Key” in the subscriber environment/database.
Note: If the Business Central subscriber environment/database is setup with Windows Authentication, there must be created an extra Service Tier, to handle the Webservice access with Business Central Password Authentication.
4.3. Service-to-Service Authentication – Initial Setup
If the replication setup requires the service-to-service authentication, there are two steps to do.
- Register an application in your Azure Active Directory tenant for authenticating API call against Business Central
- Grant access for that application in Business Central
4.3.1. Register application in Azure Active Directory (ADD)
To register an application in Azure Active Directory, do the following steps
-
Open the Azure Portal, https://portal.azure.com
-
Go to Azure Active Directory
-
Select App registrations and + New registration.
When creating the App registration select the following options
- Name: A suitable name
- Supported account type: Accounts in any organizational directory (Any Azure AD directory - Multitenant)
- Redirect URI (optional): Web + https://businesscentral.dynamics.com/OAuthLanding.htm
- Register with the Register button
The App registration is now created but requires permissions setup.
-
Go to API permissions
-
Select + Add a permission to open the Request API permissions page
-
Select Dynamics 365 Business Central
-
Select Application permissions
-
Select API.ReadWrite.All
-
Register with the Add permissions button
-
Then Grant admin consent for your organization
-
When the Consent is granted, the Status must be marked with a Green Check
After the permissions setup we must create the “Client secret”.
-
Go to Certificates & secrets
-
Select + New client secret to open the Add a client secret page
- Give the Client Secret Key a proper description
- Select the lifetime of the Client Secret Key
- Register with the Add button
-
Store the Value and Secret ID of the “Client secret” a safe place. It is not possible to restore the value again.
4.3.2. Grant access in Business Central
The Business Central Environment that receives/subscribe data from a publisher Environment / Database must be setup to receive data and grant access.
-
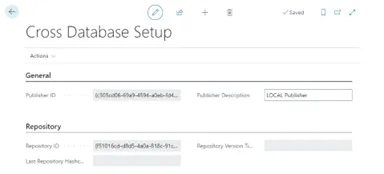
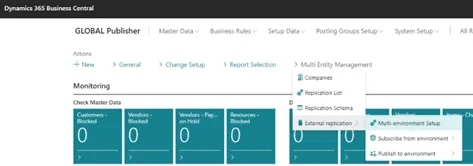
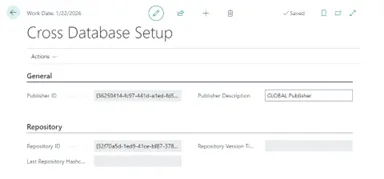
Go to Multi Entity Management > Cross Database > Cross Database Setup
- Insert the Application (client) ID into the API Client Id field in the API section at the Cross Database Setup page.
-
Go to the Azure Active Directory Applications page and create a new application with +New
-
Insert the Application (client) ID into the Client ID at the Azure Active Directory Application Card
-
Insert the User Groups and User Permissions Sets User Groups User Permissions Sets
D365 ADMINISTRATOR XTEMEM BASE D365 AUTOMATION XTEMEM BASIC D365 BASIC ISV XTEMEM MDSETUP D365 BUS PREMIUM D365 EXTENSION MGT D365 FULL ACCESS
5. Notes on Cross Database replication
Please be aware, when using Cross Environment replication between environments through SOAP Web Services, The Subscriber Database will not be able to show which Entities that are Dependent Companies.
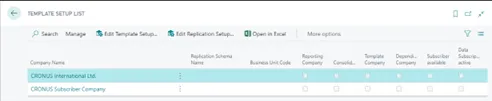
On the other hand, the Publisher Database, will show which if Cross Database replication is available
6. Troubleshooting
6.1. Publisher is “C/SIDE” based and the Subscriber is AL based.
- IF the Publisher Database is “C/SIDE” based and the Subscriber Database is AL based. The “Content Encoding” must be removed from Codeunit ”Subscription Web Request Mgt.” Disable the line: // HttpWebRequest.Headers.Add(‘Content-Encoding’,‘gzip, deflate’);
6.2. Both Publisher and Subscriber are OnPrem databases.
- OnPrem Databases both Publisher and Subscriber, must have the following added to “Service Tier Configuration”.
- Set Checkmark in “Use NTLM Authentication”
- Set the field “Max Message Size” to minimum 5120
6.3. The Subscriber Database is setup with “Windows Authentication”.
- Setup one Service Tier to handle all users with Windows Authentication.
- Setup another Service Tier to handle the Webservice access with NavUserPassword.
6.4. SOAP Exception Business Central 16
- The Cross Database Replication suddenly stop working.
-
2 example of error messages
-
- Solution: Restart of the instance.
6.5. SOAP URL containing “default” more than once.
- The automatic created SOAP URL contains “default” more than once
-
Example of incorrect url http://<environment_name>-default:7047/BC/WS/DE Subscriber Master/Codeunit/MemSubDataService?tenant=<environment_name>-default
-
Solution change the above url to http://<environment_name>:7047/BC/WS/DE Subscriber Master/Codeunit/MemSubDataService?tenant=default
-